Preparing your home properly before a sanding project can make a huge difference in how smooth, efficient, and stress-free the entire process feels. Many homeowners jump straight into booking services like floor sanding and finishing Sydney without realising that preparation plays a key role in the final outcome. A well-prepared space not only helps professionals work efficiently but also ensures better results and fewer disruptions.
If you’re planning to restore your timber floors, here’s a practical step-by-step guide to get your home ready.
Step 1: Clear the Space Completely
The first and most important step is removing all furniture, rugs, and personal items from the area. Floor sanding equipment needs full access to every part of the surface, including edges and corners.
Make sure to:
-
Remove heavy furniture like sofas, beds, and cabinets
-
Take out décor items such as lamps, plants, and artwork
-
Empty wardrobes or built-in storage if flooring extends inside
A completely clear space allows the sanding process to be carried out evenly and without obstruction.
Step 2: Plan Temporary Living Arrangements
Depending on the size of the project, certain areas of your home may be unusable for a few days. Sanding and finishing require time, especially during the drying and curing stages.
It’s a good idea to:
-
Set up alternative living areas
-
Plan access routes if only part of the home is being worked on
-
Consider temporary accommodation for larger projects
Proper planning helps minimise inconvenience during the process.
Step 3: Protect Adjacent Areas
Even with modern dust control systems, it’s wise to protect areas that are not being sanded. This helps keep your home cleaner and reduces the need for post-project cleaning.
You can:
-
Close doors to unaffected rooms
-
Use protective sheets or coverings where needed
-
Seal off open areas if recommended
Taking these precautions ensures the rest of your home remains tidy.
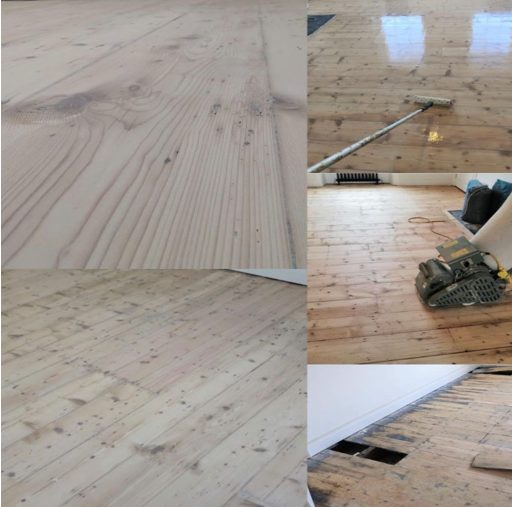
Step 4: Check for Repairs Before Sanding
Before sanding begins, it’s important to inspect your floors for any issues that may need attention. Minor repairs should be completed beforehand to achieve the best results.
Look out for:
-
Loose or damaged boards
-
Protruding nails or screws
-
Gaps or uneven sections
Addressing these issues early allows the sanding process to run smoothly and prevents complications later.
Step 5: Ensure Easy Access for Equipment
Floor sanding requires specialised machinery, which needs to be brought into your home. Making access easy for professionals can save time and effort.
Make sure:
-
Entryways are clear
-
Parking is available nearby
-
Pathways are free from obstacles
This helps the team set up quickly and begin work without delays.
Step 6: Communicate Expectations Clearly
Every home and project is different, so clear communication is essential. Discuss your expectations with the professionals before the work begins.
Topics to cover include:
-
Desired finish type
-
Timeline for completion
-
Any specific concerns or requirements
This ensures everyone is on the same page and helps avoid misunderstandings.
Step 7: Understand the Timeline
Knowing what to expect in terms of timing can help you plan better. While sanding itself may be completed relatively quickly, the finishing stage requires additional time for drying and curing.
Be prepared for:
-
Limited access to sanded areas during drying
-
Gradual return to normal use
-
Following recommended waiting times
Patience during this stage is important for achieving a durable finish.
Step 8: Prepare for a Cleaner Process
Modern sanding technology has significantly reduced dust compared to older methods. However, it’s still helpful to take basic precautions to maintain cleanliness.
Simple steps like removing delicate items and covering nearby surfaces can make a noticeable difference. A cleaner environment also helps ensure a better finish, as less dust settles on the surface during the process.
Step 9: Plan for Aftercare
Preparation doesn’t end when sanding begins—you should also think about how you’ll care for your floors afterwards. Knowing how to maintain them will help preserve their appearance and durability.
After the project:
-
Avoid placing heavy furniture immediately
-
Use protective pads under furniture legs
-
Follow cleaning recommendations
This helps keep your floors in excellent condition for years to come.
Final Thoughts
Preparing your home properly is one of the most important steps in achieving a successful floor sanding project. From clearing the space to planning your schedule, each step contributes to a smoother process and a better final result.
If you’re getting ready to restore your timber floors and want expert guidance from start to finish, Pro Finish Flooring provides professional solutions tailored to your home. Contact them today to ensure your project is handled with care and precision.